Administration
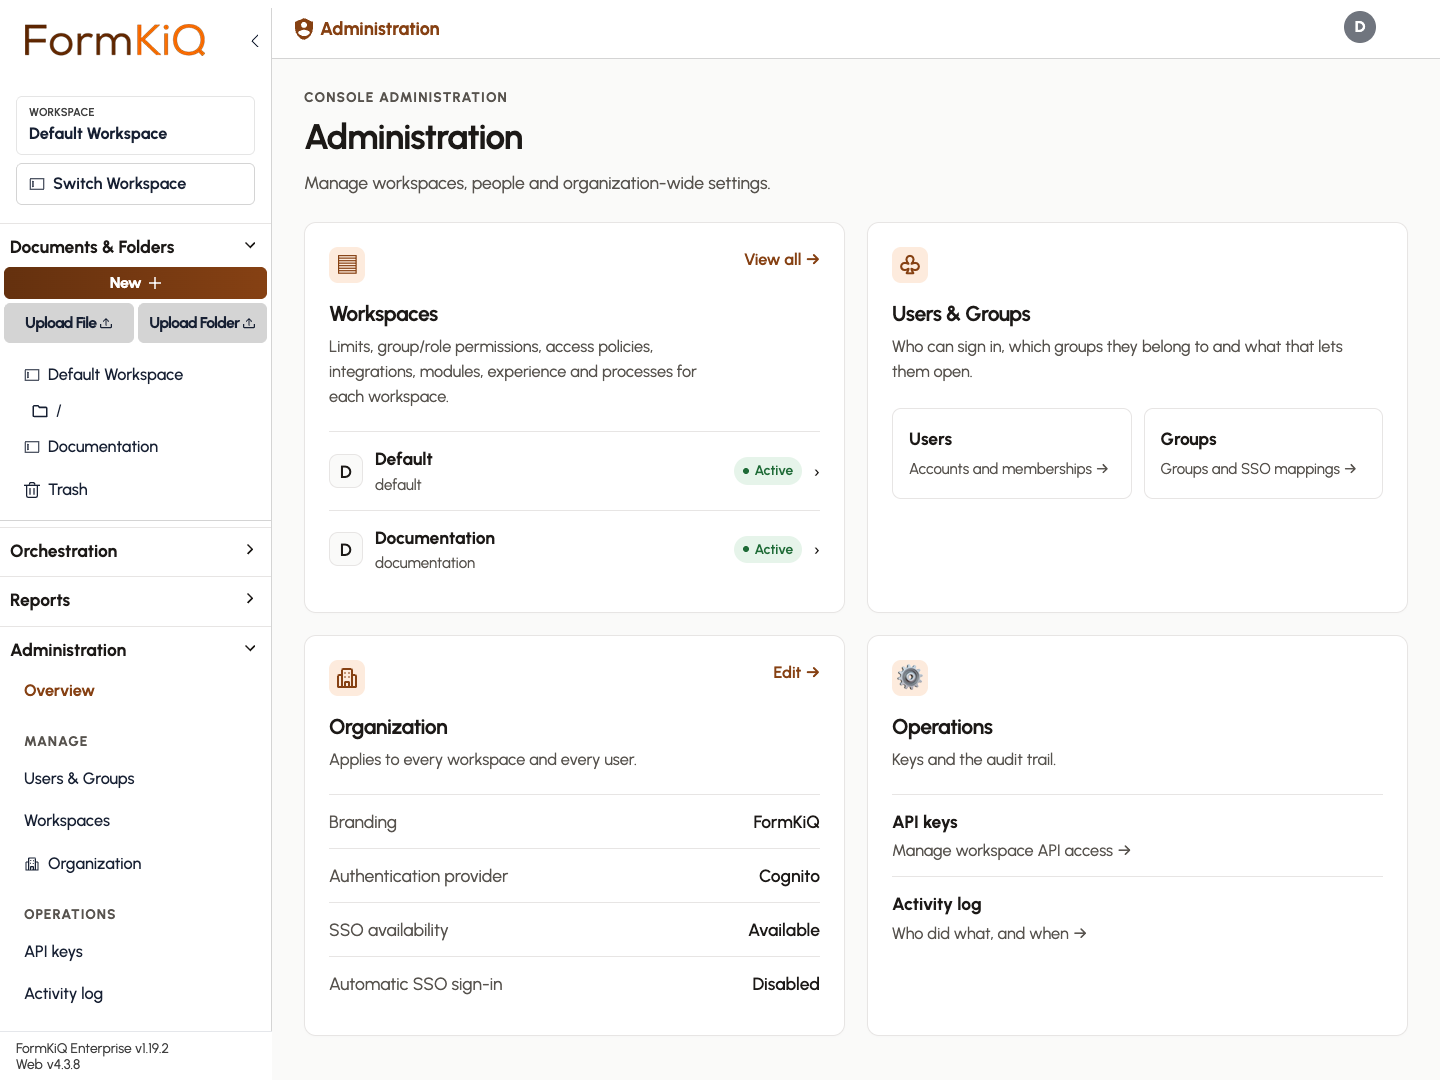
Administration in the sidebar is where you manage who can sign in, what each group can do in each workspace, and how each workspace behaves.
The screens you see depend on your own permissions. Someone who can manage users but not system settings sees Users & Groups only. Editors that you can open but not change are marked View only and name the permission you need.
| Section | Purpose | Who sees it |
|---|---|---|
| Overview | Summary of workspaces, people, organization settings, and operations. | Anyone with an administration permission |
| Users & Groups | Accounts, group membership, and SSO group mappings. | User management permission |
| Workspaces | Limits, permissions, access policies, integrations, modules, appearance, and experience for each workspace. | System management or access-control governance permission |
| Organization | Settings that apply to every workspace and user. | Administrators |
| API keys | Keys for applications that call the API. | System management permission |
| Activity log | Audit trail of who did what, and when. Commercial. | User-activity governance permission |
For the permission model behind these screens, see Security.
Users & Groups
Users
The Users list shows each account's email address and whether it is enabled.
- Add a user. Select Add New User and enter the email address. The user receives an email with a link to set a password. An address that already exists is rejected.
- Reset a password, disable, or enable an account from the user's actions.
- View / Manage User Access opens the user's group memberships and the workspace access those groups grant. The view is based on directory groups and workspace grants; global administrator access and identity-provider claims can grant more than it shows.
Adding users, resetting passwords, and changing membership need write permission for user management. Removing accounts or memberships needs delete permission.
Groups
Groups are how FormKiQ grants access. A user's groups determine which workspaces they can open and what they can do there.
- Cognito Groups lists the groups in the user directory. Select Create New Group to add one, open a group to see its members, and use Add Member to add users.
- SSO Group Mappings connects groups from your identity provider to workspace access. Use it when users sign in through SSO; see Single Sign-On.
Creating a group does not grant anything by itself. Grant it access in a workspace under Group/Role Permissions.
For the equivalent API calls, see Manage Users and Groups.
Workspaces
The Workspaces list shows every shared workspace with its status, document count, groups, and modules. Filter by Active or Inactive, or by name. Select + New workspace to create one, where your deployment allows it; deployments that use automatic site permissions create workspaces from groups instead.
Personal My Documents workspaces are not listed. They follow the default workspace's settings.
Open a workspace to manage it. Its settings are grouped into tabs.
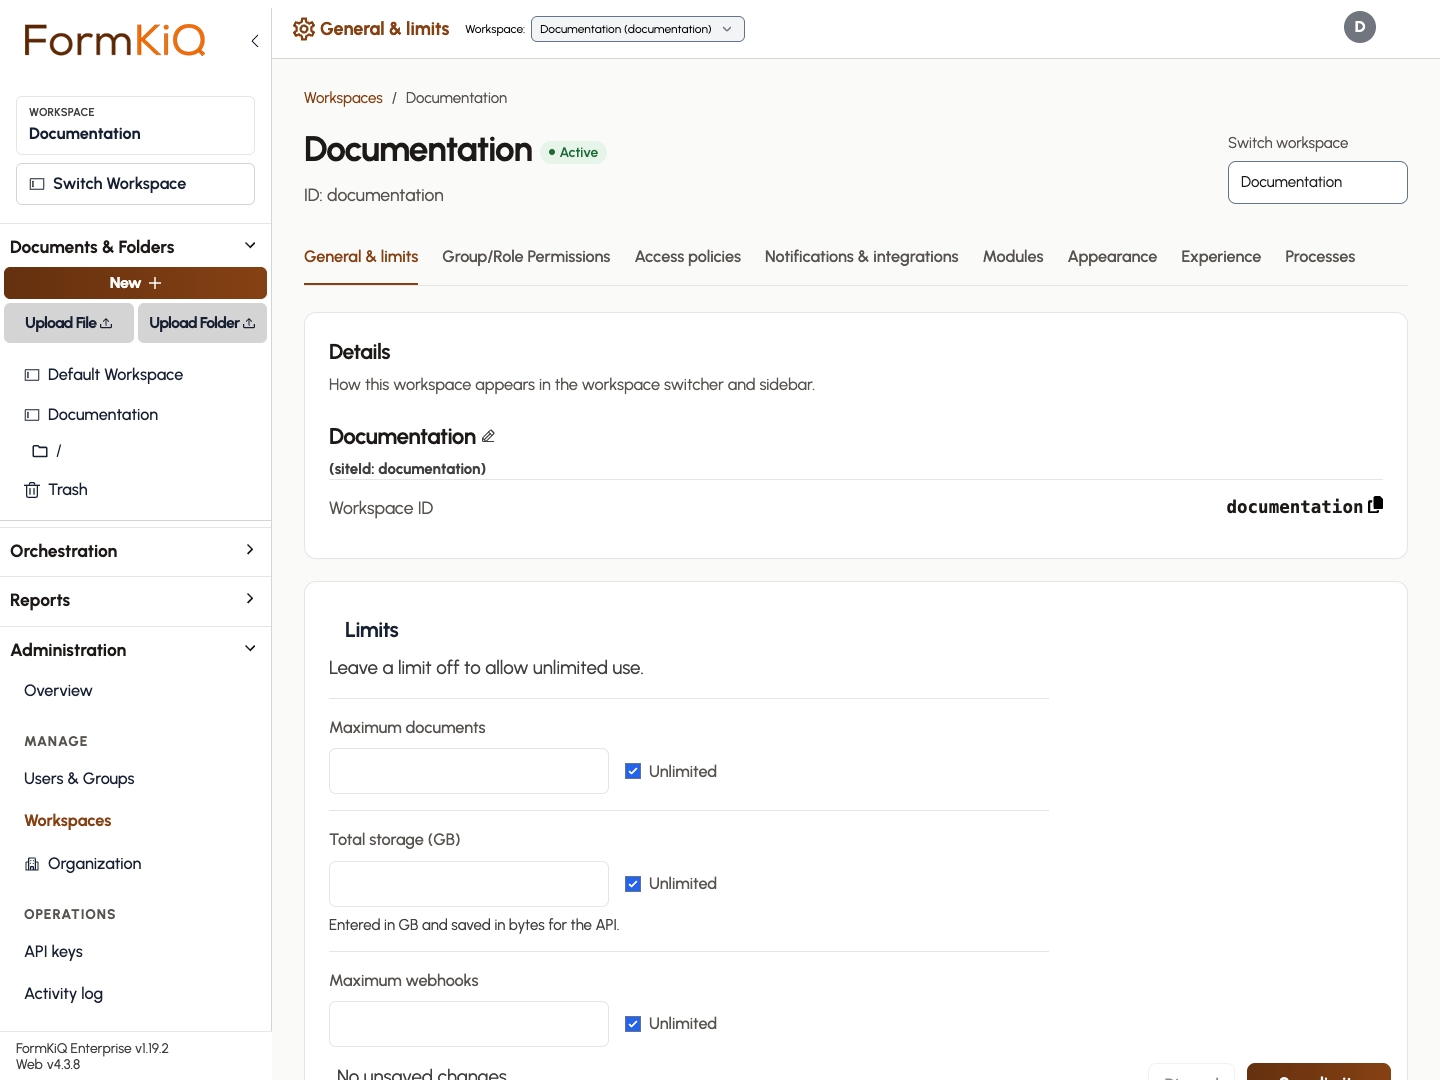
General & Limits
- Details. The name shown in the workspace switcher and sidebar, and the workspace ID.
- Workspace status. An inactive workspace is hidden from users. Its documents and settings are kept.
- Allowed file types. Restrict uploads with an allow list or a deny list of content types. Only one of the two can be active. Bundles such as common image formats or macro-enabled Office files add several types at once.
- Limits. Maximum documents, Total storage (GB), and Maximum webhooks. Leave a limit off to allow unlimited use.
Group/Role Permissions
This tab lists the groups that can use the workspace and what each may do.
- Select Add group and choose a group, or type the name of an identity-provider group.
- Choose a predefined role, or select the exact permissions the group should have.
- Select Save permissions.
The permission picker starts with presets for four areas: document access, orchestration, governance, and administration. Applying a preset changes only that area. You cannot grant a permission you do not hold yourself in that workspace.
Use Remove access to take a group out of the workspace. See API Permissions for what each permission allows.
Access Policies
Access policies add attribute-based rules on top of group permissions, using Open Policy Agent. This tab appears when you hold access-control governance permission.
- + Add New Policy Item builds a rule from methods, resources, groups, and attribute conditions.
- + New from Paste / Rego accepts a policy item as JSON or raw Rego text.
- FormKiQ Web warns when a rule uses attribute operators that can break attribute search under policy filtering, and can generate an equivalent set of equality rules.
See Open Policy Agent before writing policies.
Notifications & Integrations
Each integration is saved separately. Secret fields never display the stored value; entering a new value replaces it.
- Notifications. Choose Amazon SES or SMTP as the provider and set the sender email. SMTP credentials are referenced by the ARN of an AWS Secrets Manager secret. After saving, use Send Test Message to confirm delivery.
- OpenAI. The API key used by features that call OpenAI.
- Google integration. The workload identity audience and service account. See Google Workload Identity Federation.
- DocuSign. Environment, user ID, integration key, RSA private key, and Connect settings. After saving, Create Test Envelope verifies the credentials using a disposable document. See E-Signature.
Modules
Choose which installed web modules are available in the workspace, and open a module to configure its settings. Some modules depend on others. Changing modules needs read and write permission for entities and attributes in the workspace, because module configuration is stored there.
Appearance
Choose a theme for the workspace or inherit the organization theme.
Experience
Experience settings change what people see in the workspace. They do not change what the API allows.
| Setting | Controls |
|---|---|
| Section Visibility | Which groups see the Documents & Folders, Orchestration, and Reports sidebar sections. With no groups selected, everyone sees the section. |
| Queues | Whether queues appear in the workspace. |
| Document & Folder Actions | Which groups see each action in the actions menu. |
| Info panel | Which info panel tabs are shown, and which attributes and tags each group sees. |
| PDF Viewer Settings | Whether PDFs open in the browser's viewer or the built-in canvas viewer. |
| Upload | The post-upload processing notice and whether uploads can be marked as controlled revisions. |
| Notifications | Whether users are notified about checkout and legal hold activity by other users. |
| Navbar Group Display | Which group names appear in the account menu. |
The experience editor needs read permission for entities, because the preferences are stored as workspace entities.
Processes
Commercial. Platform administrators only.
Processes are one-time or occasional maintenance jobs that run in your browser session against one workspace:
- Run Workflow on All Documents adds a workflow to every document that has not already run it.
- Reindex All Documents reindexes document attributes.
- Create RetentionPolicy Entity Type prepares a workspace for retention policies.
- Controlled Revision Attributes creates or validates the attributes that controlled revisions need.
Keep the page open until a process finishes. Long runs pause at intervals for confirmation unless you turn that off.
Organization
Organization settings apply to every workspace and every user.
- Sign-in. With Automatic SSO sign in enabled, users who reach the sign-in page are redirected to Single Sign-On when SSO is configured.
- Branding. The global brand is used after sign-in unless a workspace chooses its own.
API Keys
API keys let an application call the FormKiQ API for one workspace without a user sign-in.
- Open API keys and select Create new.
- Name the key and choose its permissions.
- Copy the key when it is displayed. It is shown once only.
A key cannot be given more authority than you hold in the workspace. See Manage API Keys.
Activity Log
Commercial.
The activity log answers who did what, and when.
- Choose an Activity Type, such as documents, attributes, workflows, API keys, or users. Some types require a further filter, such as a document ID.
- Choose a Date Range. Longer ranges load progressively.
- Select Apply Filters.
Switch between Story View, which reads as a timeline, and Raw Data. Timestamps can be shown in local time or UTC. Export what is loaded with Export Loaded Results as CSV, or use Generate CSV of All Filtered Results for the full result set.
See Audit User Activity and Reporting.
Troubleshooting
| Problem | What to check |
|---|---|
| Administration is missing from the sidebar | Your groups hold no administration permission in any workspace. |
| A tab shows View only | The message names the permission required to change it. Ask a workspace administrator to grant it. |
| A new group has no effect | Add the group under Group/Role Permissions in each workspace it should use. |
| A user cannot see a workspace | Check the user's groups under View / Manage User Access, and confirm the workspace is Active. |
| Test notification is not delivered | Save the notification settings first, then confirm the sender address is verified with the provider. |
| Experience settings do not load | The editor needs read permission for entities in that workspace. |